
The first time I tried to cook chicken tenderloin, I treated it like a tiny chicken breast and wondered why dinner tasted like warm cotton. The problem was not the meat. It was the timing. Tenderloins are lean, narrow, and quick to overcook, so they need a short, hot cook and a brief rest. Once you know that, cook chicken tenderloin becomes one of those useful weeknight skills that saves you from ordering takeout when everyone is hungry.
This recipe gives you a lightly seasoned, golden piece of chicken with a tender center. You need 1 pound, or 454 grams, of chicken tenderloins, 15 grams of olive oil, 6 grams of kosher salt, 2 grams of smoked paprika, 1 gram of garlic powder, 1 gram of black pepper, and 1 gram of dried oregano. If your tenderloins have a tough white tendon attached, trim it with a small knife or pull it out with a paper towel.
The simple seasoning and setup
Pat the chicken dry before seasoning. This is not busywork: surface moisture has to evaporate before browning can begin, and wet chicken steams instead. Toss the tenderloins with the oil, salt, paprika, garlic powder, pepper, and oregano until every piece is coated. Let them sit for 10 minutes while the oven or pan heats, but do not leave raw chicken on the counter for a long stretch.
To cook chicken tenderloin in the oven, heat the oven to 425°F. Line a sheet pan with parchment or foil and arrange the pieces with a little space between them. Crowding traps steam and gives you pale, rubbery edges. Most tenderloins take 15 to 20 minutes, depending on thickness. Start checking at 14 minutes with an instant-read thermometer in the thickest part. Chicken is ready at 165°F.
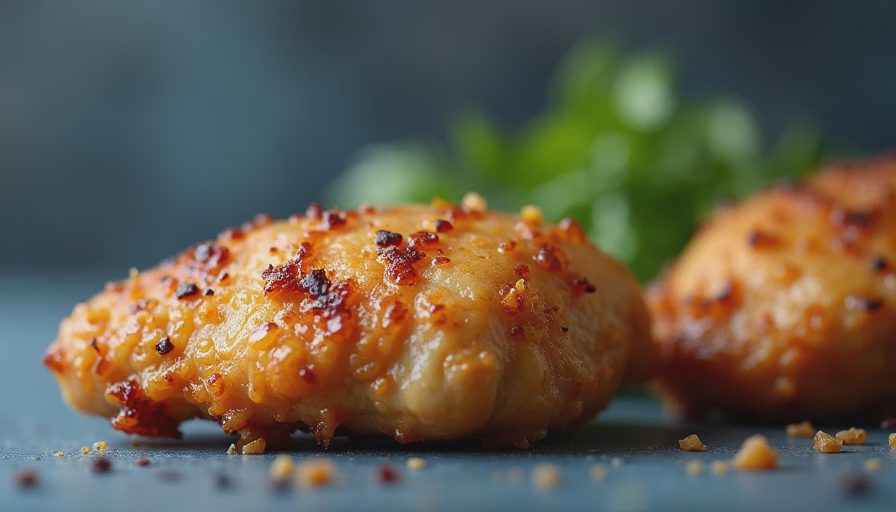
How to cook chicken tenderloin in a skillet
The skillet method is my favorite when I want dinner on the table quickly. Heat a large skillet over medium-high heat for about two minutes, then add 15 grams of neutral oil, such as avocado, canola, or vegetable oil. Place the seasoned chicken in one layer. You should hear a steady sizzle, not an aggressive crackle that sends oil across the backsplash.
Cook the tenderloins for 3 to 4 minutes on the first side. Turn them when the underside is browned and releases easily from the pan. Cook the second side for another 3 to 4 minutes, then check the thickest piece. If the outside is dark but the center is not ready, reduce the heat to medium and cook for another 1 to 2 minutes. A lid can help finish thick pieces, but it also softens the crust.
When you cook chicken tenderloin this way, do not slice every piece open to check it. That lets juices run onto the cutting board and makes the smallest pieces drier. A thermometer is more reliable. Remove the chicken at 160 to 162°F if you are comfortable allowing carryover cooking during a five-minute rest; otherwise, continue cooking until it reaches 165°F in the pan.
Air fryer and oven timing
An air fryer gives chicken tenderloins crisp edges with very little oil. Preheat it to 400°F for three minutes if your model calls for preheating. Arrange the chicken without overlapping, spray or brush the surface lightly with oil, and cook for 8 minutes. Turn the pieces and cook for 3 to 6 more minutes. Smaller tenderloins can finish in 10 minutes total, while thick ones may need 15 minutes.
To cook chicken tenderloin from frozen, separate the pieces as soon as you can and expect the cooking time to increase. The coating will not cling as well, and the outside can brown before the middle is safe. Check several pieces with a thermometer rather than trusting the timer. For fresh chicken, resting for five minutes is enough. The meat should feel firm but not hard when pressed gently.

What went wrong when mine turned rubbery
My most memorable failure happened with a crowded sheet pan. I piled nearly two pounds of tenderloins onto a small baking sheet, added extra oil, and blamed the chicken when it came out gray and chewy. The real problem was steam. I fixed it by using two pans, spacing the pieces apart, and reducing the cooking time because the thinner pieces browned faster.
If your chicken is dry, the usual cause is overshooting 165°F by a wide margin. If it is pale, pat it dry and use a hotter pan or oven. If the seasoning tastes flat, increase the salt slightly next time rather than burying the chicken under more paprika. If a thick piece is done outside but raw inside, flatten it gently to an even thickness before cooking. A quick pounding with the smooth side of a meat mallet works, but the bottom of a small saucepan works too.
Ways to serve the finished chicken
Cook chicken tenderloin on Sunday and use it for several meals. Slice it over rice with steamed broccoli and a spoonful of plain yogurt mixed with lemon juice. Tuck it into a tortilla with shredded lettuce, tomato, and salsa. Chop it into a salad with cucumber and a mustard vinaigrette. For a child-friendly plate, serve it with roasted potatoes and apple slices; Lily, my official taste-tester, is much more interested in dipping sauce than garnish.
For a fast pan sauce, remove the chicken and add 120 grams of low-sodium chicken broth to the skillet. Scrape up the browned bits, simmer for two minutes, then stir in 10 grams of butter and 5 grams of lemon juice. Pour it over the rested chicken. The sauce cannot rescue truly overcooked meat, but it can make a correctly cooked tenderloin feel like a proper dinner instead of an emergency protein delivery.
A reliable final check
Before you cook chicken tenderloin, have the thermometer, pan, oil, and serving plate ready. Dry the meat, season it with measured amounts, and choose one cooking method instead of switching halfway through. Keep the pieces spaced apart, begin checking early, and rest them before slicing. Refrigerate leftovers within two hours and use them within three to four days.
The goal is not a picture-perfect dinner. One piece may brown more than another, and a little unevenness is normal in a home kitchen. It doesn't matter if it's perfect or not, just make it delicious. Put on the apron and go ahead and do it.

No comments yet.