This sourdough bread recipe is the one I return to when I want a chewy, well-browned loaf without turning my kitchen into a bakery laboratory. It uses 500 grams of flour, a lively starter, water, salt, and patience. That last ingredient is annoyingly important, but the dough does not require perfect shaping or expensive equipment. An ordinary Dutch oven, a large bowl, and a kitchen scale will get you there.
I learned this formula after enough collapsed loaves to fill a compost bin. The biggest lesson was not kneading harder. It was learning to read the dough instead of obeying the clock. Your kitchen temperature, starter strength, and flour brand all change the schedule. The gram weights below stay steady; the visual cues keep you from baking a heavy brick.
Ingredients and starter check
For this sourdough bread recipe, gather 100 grams active sourdough starter, 350 grams water, 500 grams unbleached bread flour, and 10 grams fine sea salt. This makes one loaf weighing about 900 grams before baking. You can replace up to 100 grams of bread flour with whole-wheat flour, but expect a slightly tighter crumb and a dough that ferments faster.
Your starter should be recently fed, bubbly, and able to rise noticeably within four to eight hours at room temperature. It does not have to double dramatically in a glass jar to be useful, but it should smell pleasantly tangy rather than sharply like nail-polish remover. If Gus, my starter, has been neglected in the refrigerator for a month, I feed him twice before mixing dough. A weak starter is the usual reason a loaf barely rises, not a mysterious problem with your shaping.
Use a scale for the flour and water. Measuring cups are fine for soup, but sourdough is sensitive to a 30-gram water mistake. That difference can turn a manageable dough into a sticky puddle.

Mixing and building strength
Combine 350 grams water and 100 grams starter in a bowl. Add 500 grams flour and mix until no dry patches remain. Cover and rest for 30 minutes. This short rest, called an autolyse when salt is left out, gives the flour time to hydrate and makes the dough less resistant.
Sprinkle in 10 grams salt and squeeze the dough through your fingers until it is evenly distributed. Do not panic if it feels shaggy. Cover the bowl and leave it at about 75 degrees Fahrenheit for four to six hours. During the first two hours, complete four sets of stretch-and-folds, one every 30 minutes. Grab one edge, pull it upward without tearing, and fold it across the dough. Turn the bowl and repeat three more times.
The dough will become smoother, puffier, and more elastic after each set. If it still spreads instantly after the fourth fold, give it another fold 30 minutes later. The failure mode here is usually underdeveloped gluten, and extra handling is a better fix than adding flour. Adding handfuls of flour makes the finished loaf dense.
Bulk fermentation and shaping
Bulk fermentation is finished when the dough has grown by roughly 50 to 75 percent, has bubbles along the sides, and jiggles when you gently move the bowl. It may take three hours in a warm summer kitchen or eight hours in a cool room. In this sourdough bread recipe, those signs matter more than the exact number on the timer.
Turn the dough onto a lightly floured counter. Shape it into a loose round by folding the edges toward the center, then let it rest seam-side down for 20 minutes. For final shaping, flip it over, fold the top down, fold the sides inward, and roll the bottom upward into a snug package. Place it seam-side up in a floured bowl lined with a clean towel.
If the dough tears during shaping, it probably fermented too long or developed too much acidity. If it feels tight and snaps back immediately, it needs another 15 minutes of rest. A little flour on the counter is useful; a snowstorm of flour is not. Excess flour prevents the seams from sealing and leaves pale patches on the crust.
Cold proofing and baking
Cover the shaped loaf and refrigerate it for eight to 16 hours. The cold proof improves flavor and makes scoring easier. When you are ready to bake, place a Dutch oven with its lid in the oven and preheat to 475 degrees Fahrenheit for at least 45 minutes.
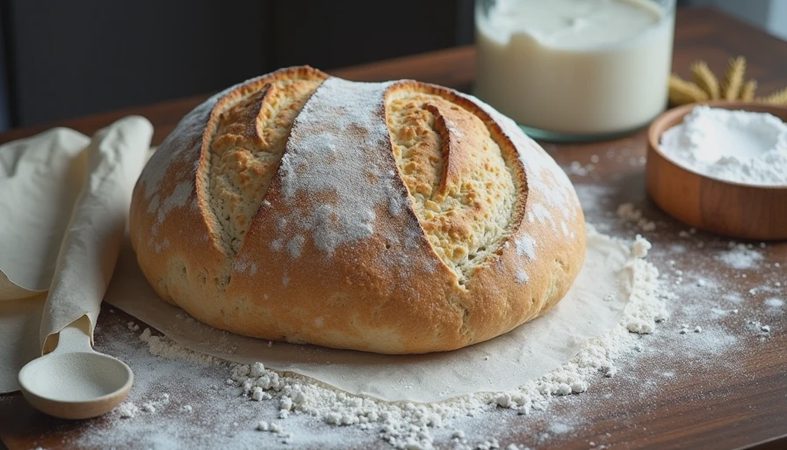
Turn the cold dough onto parchment and score one decisive slash about half an inch deep. Carefully lower it into the hot pot, cover, and bake for 20 minutes. Remove the lid, reduce the temperature to 450 degrees, and bake another 20 to 25 minutes. The crust should be deep brown, not blond. If you have an instant-read thermometer, the center should be around 205 to 210 degrees.
This sourdough bread recipe needs a full cooling period. Wait at least one hour before slicing, even though the smell will make that feel unreasonable. Cutting early releases steam and can create a gummy crumb.

What went wrong, and how to fix it
A flat loaf usually points to one of three issues: an inactive starter, overproofing, or weak gluten development. Next time, mark the dough level with a rubber band and shape when it has risen only halfway to three-quarters of its starting volume. If the loaf spreads but still tastes pleasantly sour, it is edible; toast it, make croutons, or call it rustic. I have served worse bread to people I love.
A dense, gummy center often means underbaking or slicing too soon. Return a sliced loaf to a 350-degree oven for 10 to 15 minutes if the middle is only slightly damp. If it is genuinely paste-like, do not keep pretending. Throw it in the trash, clean the bowl, and start again with a stronger starter and a longer bake.
A pale crust usually means the loaf needed more uncovered time. A burnt bottom can come from a thin Dutch oven or a low oven rack. Move the pot to the middle rack and place a baking sheet underneath it. These small changes helped more than buying another gadget.
A simple schedule for a busy day
For a practical sourdough bread recipe schedule, feed your starter at 8 a.m. Mix the dough at noon, fold until 2 p.m., and shape around 5 p.m. Refrigerate overnight and bake at 7 a.m. the next day. If your schedule is different, shift the times rather than forcing the dough to match them.
For a same-day loaf, use a warm spot around 78 degrees and begin early. For a slower loaf, reduce the starter to 75 grams and expect bulk fermentation to take longer. Keep notes about room temperature, rise time, and the final texture. My old data-analyst habit is useful here: one loaf is an anecdote, but three loaves reveal a pattern.
The loaf I actually want to eat
This sourdough bread recipe produces a crisp crust, a lightly tangy flavor, and an open but practical crumb that can hold butter without collapsing. It will not look identical every time, and that is not a character flaw. Flour behaves differently in Denver’s dry air than it does in a humid kitchen, and your starter has its own personality.
Start with the exact formula, watch the rise, and make one adjustment at a time. Photograph the ugly loaf beside the good one; the comparison teaches you more than another hour of scrolling. It does not matter if it is perfect or not, just make it delicious. Put on the apron and go ahead and do it. The dough will forgive you. So will I.


No comments yet.