Artisan bread sounds like something that requires a brick oven, a linen-lined basket, and a flour-dusted kitchen with suspiciously good lighting. It does not. You can make a deeply flavored loaf in an ordinary home oven with a mixing bowl, a kitchen scale, and enough patience to let the dough do its work. The first loaf might spread sideways or brown too quickly. That is not a character flaw. It is information.
This is my practical approach to artisan bread: exact weights, realistic timing, and no promise that your first boule will look like it belongs in a bakery window. I have baked thousands of loaves, including some that came out looking like a tire. The dough will forgive you. So will I.
What makes artisan bread different?
The word artisan does not describe one official formula. It usually points to bread made with a slower process, careful fermentation, a crisp crust, and an open or pleasantly chewy crumb. A basic loaf can contain only flour, water, salt, and yeast. Sourdough adds a living starter and a longer schedule, but commercial yeast works beautifully when you want bread today rather than bread tomorrow.
For a dependable beginner formula, weigh 500 grams of bread flour, 350 grams of water, 10 grams of salt, and 3 grams of instant yeast. That is 70 percent hydration, which gives you a dough that is moist but manageable. All-purpose flour works too, though the dough may feel softer because it often contains slightly less protein.
Mix the flour and water first, then rest the mixture for 20 minutes. This short pause hydrates the flour and makes mixing easier. Add the salt and yeast, knead for 5 minutes by hand, and cover the bowl. Let the dough rise at room temperature for about 2 hours, or until it looks expanded and airy rather than simply doubled by the clock.

A simple schedule that actually works
After the first rise, gently tip the dough onto a lightly floured counter. Avoid burying it in flour; excess flour makes the finished loaf dense and dry. Shape it into a rough round by folding the edges toward the center, then turn it seam-side down and create surface tension by dragging it a few inches across the counter.
Place the dough in a bowl lined with a clean, well-floured kitchen towel. Cover it and let it rest for 45 to 60 minutes while the oven heats to 450 degrees Fahrenheit. If your schedule is crowded, refrigerate the shaped dough for 8 to 16 hours instead. Cold fermentation develops flavor and makes scoring easier, although a very active dough can still overproof in the refrigerator.
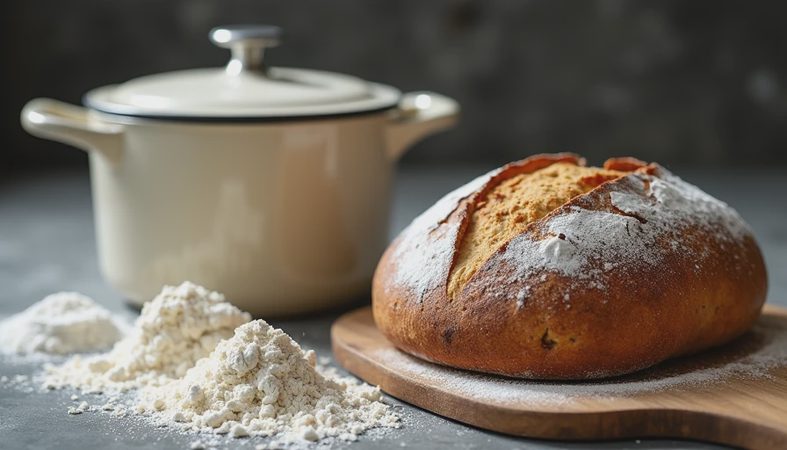
For baking, a covered Dutch oven is helpful because it traps steam around the loaf. Preheat the pot for 30 minutes, carefully lower in the dough, and score the top with a sharp knife or lame. Bake covered for 25 minutes, then uncovered for another 18 to 25 minutes. The crust should be a rich brown, not pale beige and not charcoal.
If you do not own a Dutch oven, place the dough on a preheated sheet pan and put a metal pan on the lower rack. Add 240 grams of boiling water to that pan when the loaf goes in. Steam helps the crust stay flexible during oven spring. Keep your face away from the first rush of steam; it is not dramatic in a fun way.
The failure modes I see most often
The most common problem with artisan bread is a flat loaf. Usually, the dough fermented too long, the starter or yeast was weak, or the shaped dough did not have enough surface tension. A dough that has risen high and then deflates when touched is probably overproofed. Bake it anyway if it smells good, but expect a tighter crumb and less height next time.
A gummy center usually means the loaf was removed too early. Crust color is not a reliable doneness test. Let the bread cool for at least 60 minutes before slicing so the interior can finish setting. If you cut it while hot, the crumb can seem wet even when the loaf was baked adequately. For extra confidence, aim for an internal temperature around 200 to 210 degrees Fahrenheit.
A pale crust often means the oven was not fully preheated or the loaf had too little steam. A crust that goes dark before the center is ready can be protected with foil during the final 10 minutes. Your oven may run hotter than its display says; an inexpensive oven thermometer is more useful than guessing.

How to build better flavor without buying more equipment
Time is the cheapest flavor tool in artisan bread. Reduce the yeast to 1 gram and let the mixed dough rise slowly in the refrigerator for 12 to 24 hours. Bring it out, shape it while cold, and allow 60 to 90 minutes for the final rise. The schedule is longer, but the flavor becomes nuttier and more complex.
You can also replace 50 grams of bread flour with whole-wheat flour for a deeper taste. Do not immediately substitute half the flour with whole wheat; that version absorbs more water and can become heavy while you are still learning dough strength. A tablespoon of honey or olive oil is optional, but neither ingredient is required for a good loaf.
My favorite artisan bread variation is a plain country loaf with 25 grams of toasted sunflower seeds and 15 grams of rolled oats. Add them after the first 5 minutes of kneading. Seeds make the dough slightly heavier, so give the final proof an extra 10 minutes and watch the dough rather than the timer.
A realistic troubleshooting checklist
If the dough is sticky, wait 10 minutes before adding flour. Flour continues absorbing water during the rest, and many sticky doughs become easier to handle with a few folds. If it still clings to everything, wet your hands lightly instead of adding handfuls of flour.
If the loaf tears along the side, the score was too shallow or the dough needed more proofing. Make one confident slash about half an inch deep at a slight angle. If the crumb is dense, strengthen the dough with three sets of folds, spaced 30 minutes apart during the first rise.
If your artisan bread is delicious but ugly, congratulations: you have bread. Take notes about room temperature, dough feel, and bake time. Bakers who record those details improve faster than bakers who simply repeat the same recipe and hope.
For a first attempt, plan on about 4 hours from mixing to cooling, or use the overnight method for a loaf ready the following afternoon. Set out the flour, salt, yeast, scale, and bowl before you begin. Put on the apron and go ahead and do it. It does not matter if it is perfect or not, just make it delicious.
Serving and storing the loaf
Wait until the loaf is cool, then slice it with a serrated knife. The first day is ideal for butter, soup, or a fried egg. On day two, toast thick slices and add sharp cheddar, roasted vegetables, or a spoonful of jam. Store the cut loaf with the cut side down on a board for up to two days; plastic can soften the crust.
For longer storage, slice the artisan bread once it has cooled completely, place the slices in a freezer bag, and freeze for up to three months. Toast slices straight from frozen. A slightly imperfect loaf is still far better than an untouched bag of flour, so start with the formula, watch the dough, and let experience do the rest.


No comments yet.