Easy sourdough should not require a sunset-lit kitchen, a $300 mixer, or the instincts of someone who has baked since birth. This easy sourdough method is for a regular home baker with a jar of starter, a bowl, a kitchen scale, and enough patience to let dough do its slow, slightly mysterious thing. Your loaf might crack on one side. Mine does. It can still make excellent toast.
The formula below makes one medium boule with a tender, chewy crumb and a crisp crust. You will need 100 grams active sourdough starter, 350 grams water, 500 grams bread flour, and 10 grams fine sea salt. A digital scale is more useful than almost any specialized tool because bread responds to ratios, not vibes. If your starter is not rising after feeding, do not begin yet. A sleepy starter gives you sleepy bread.
What makes this sourdough method beginner-friendly
The first rule of easy sourdough is to watch the dough, not the clock alone. Room temperature changes fermentation dramatically. In my Denver kitchen, a loaf can bulk ferment in five hours during a warm summer afternoon and take eight hours in January. The target is dough that looks smoother, has expanded by roughly 50 percent, and shows bubbles around the edges. It does not need to double.
Mix the starter and water first, then add flour and stir until no dry patches remain. Cover the bowl and rest for 30 minutes. This pause, called autolyse when salt is added later, gives the flour time to hydrate. Add the salt with 20 grams additional water, squeezing and folding the dough until it feels evenly mixed. It will be sticky. That is normal, not a personal insult from the bread gods.
For the next two hours, complete four sets of stretch-and-folds, one every 30 minutes. Wet your hand, lift one side of the dough, and fold it over the center. Turn the bowl and repeat three more times. By the final set, the dough should hold its shape a little better. If it remains shaggy, give it another gentle fold rather than dumping in extra flour.

Timing your easy sourdough loaf
After the folds, leave the covered dough alone until bulk fermentation is complete. This is where many beautiful internet recipes become unhelpful. “Let rise until doubled” sounds precise but is not. A dough at 78 degrees Fahrenheit behaves very differently from one at 65 degrees. Use the signs: a domed surface, visible bubbles, a wobble when you move the bowl, and an airy feel beneath your fingers.
Turn the dough onto a lightly floured counter and shape it into a loose round. Rest for 20 minutes, then tighten the shape by pulling the surface toward you in short motions. Place it seam-side up in a floured bowl or a clean kitchen towel tucked into a mixing bowl. Cover and refrigerate for 8 to 16 hours. This cold proof develops flavor and makes scoring less chaotic.
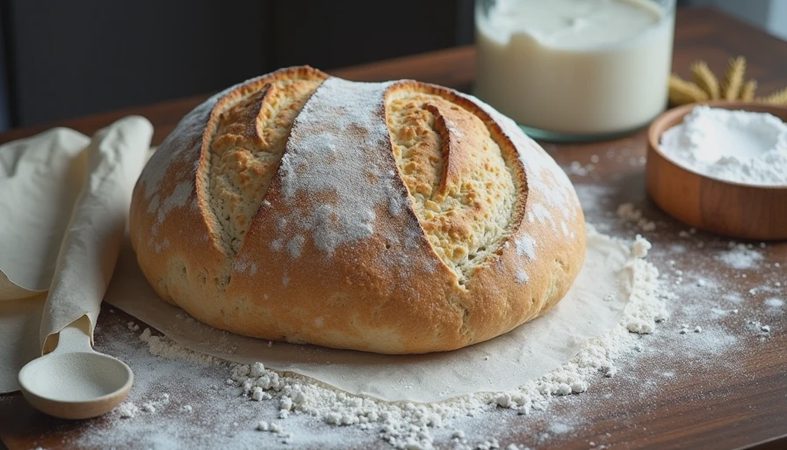
The next morning, heat your oven to ih 475 degrees Fahrenheit with a Dutch oven inside for at least 45 minutes. Tip the cold dough onto parchment, score one confident slash about half an inch deep, and lower it into the hot pot. Bake covered for 20 minutes, then uncover and bake another 20 to 25 minutes, until the crust is a deep brown. Cool for at least one hour before slicing. I know. The loaf smells like a dare. Cutting early can turn the crumb gummy.
The failure modes nobody photographs
If your easy sourdough loaf spreads into a pancake, the dough was probably over-fermented, under-strengthened, or both. Next time, end bulk fermentation earlier and add one extra fold during the first 90 minutes. If the dough feels very loose from the beginning, your flour may absorb less water than mine. Hold back 25 grams of the water during mixing and add it only if the dough can handle it.
A dense loaf with a wet stripe near the bottom usually points to under-fermentation, a weak starter, or slicing before the loaf cooled. Feed the starter twice at room temperature before baking, and look for it to rise substantially within four to six hours. If the crust burns while the middle remains pale, reduce the oven to 450 degrees after removing the lid and place a baking sheet beneath the pot. Your oven may have a dramatic bottom heating element. Mine certainly does.
A loaf that barely rises is not automatically trash, but it may not be sandwich material. Toast thick slices with butter, turn them into croutons, or make breadcrumbs. Bread has more than one job. When I once baked a genuinely collapsed loaf after misreading a timer, Mark called it “rustic.” Lily fed a piece to the backyard birds. Both assessments were fair.

Small adjustments for better results
For a milder flavor, shorten the refrigerator proof to 8 hours and use a starter that has recently peaked. For sharper flavor, proof closer to 16 hours, but avoid pushing far beyond that until you understand how your dough behaves. You can replace up to 75 grams of bread flour with whole wheat flour for a nuttier loaf. More than that changes the structure and usually requires extra water and stronger folding.
No Dutch oven? Put the dough on a preheated baking sheet and place a metal pan on the lower rack. Add 240 grams hot water to that pan when the loaf goes in to create steam. The crust may be slightly less blistered, but the bread can still be delicious. Do not use a glass dish for this steam trick; sudden temperature changes can break glass.
Keep your starter in a clean jar with room to expand. At room temperature, feed it daily if you bake often. Otherwise, refrigerate it and refresh it once or twice before making easy sourdough. Use a rubber band to mark its starting level. That simple trick tells you whether it actually rose, rather than relying on a few hopeful bubbles.
Your practical easy sourdough checklist
Before mixing, confirm that your starter is active, your flour is weighed, and your oven schedule leaves room for a long fermentation. During bulk rise, record the room temperature and the time of each fold. I used to track everything in a spreadsheet because I was, unfortunately, still a data analyst at heart. A note on your phone works just as well: “mixed at 9 a.m., shaped at 3 p.m., baked at 8 a.m.”
Do not chase a perfect round loaf. Chase a dough that has fermented enough, a crust that is fully colored, and a crumb that tastes good with salted butter. The point of easy sourdough is not to perform competence for strangers online. It is to make bread you want to eat again tomorrow.
If your first loaf looks lopsided, write down what happened and bake another one. Change one variable at a time, such as fermentation length or water temperature, so you can learn from the result. The dough will forgive you. So will I. Put on the apron and go ahead and do it. It does not matter if it is perfect or not, just make it delicious.


No comments yet.