Food science sounds like something that belongs in a white lab coat, not beside a bowl of sticky dough. But food science is simply the reason your sourdough rises, your cake sets, and your pie crust turns either flaky or frustratingly tough. Once you understand a few practical principles, baking stops feeling like a collection of mysterious rules. You can look at a flat loaf and make a reasonable guess about what happened instead of blaming yourself or your oven.
I learned this the slow way, through burned loaves, dense sandwich bread, and one spectacularly sunken birthday cake. My data analyst brain wanted clean answers. Baking offered variables: flour temperature, room humidity, starter strength, mixing time, and whether Lily had just opened the oven door. The helpful part is that you do not need a laboratory. A scale, a thermometer, and a notebook will take you surprisingly far.
What flour and water are doing in your dough
The first useful piece of food science is hydration. When flour meets water, the flour's proteins begin forming gluten, the stretchy network that helps dough hold carbon dioxide from fermentation. Starch also absorbs water and swells as the dough rests. That is why a dough can look shaggy immediately after mixing and become smoother after a 30-minute rest.
Hydration is the percentage of water compared with flour by weight. A dough made with 500 grams of flour and 350 grams of water is 70 percent hydration. That number is not a quality score. A 70 percent dough can be wonderful for a rustic loaf and annoying for a beginner if the flour is weak or the room is warm.
For a dependable starting point, try 500 grams bread flour, 350 grams water, 100 grams active starter, and 10 grams salt. Mix, rest for 30 minutes, then perform four gentle stretch-and-folds at 30-minute intervals. If the dough spreads like batter after the second fold, do not automatically add a handful of flour. Give it another rest first. Flour often needs time to catch up with the water.

Yeast, starter, and the clock
Fermentation is another place where food science saves your sanity. Yeast consumes available sugars and produces carbon dioxide and organic acids. The gas creates bubbles; the acids contribute flavor and affect dough strength. A starter that has doubled after feeding is usually more useful than one that merely looks bubbly at the surface.
Temperature controls the pace. At about 75 degrees Fahrenheit, a healthy sourdough may need four to six hours for bulk fermentation, while the same dough in a 68-degree kitchen could take considerably longer. Those are working ranges, not commandments. Watch the dough: it should look aerated, feel lighter, and rise by roughly 30 to 50 percent before shaping.
The classic failure is overproofing. The dough rises beautifully, then collapses when you turn it out. That happens because the gluten network has stretched beyond its ability to hold the gas. Underproofed dough usually feels tight and springs back quickly when pressed. Overproofed dough feels fragile, slack, and difficult to score. The fix is not always more flour. Next time, shorten bulk fermentation or reduce the final proof.
Heat changes everything in the oven
Food science also explains why oven temperature is more complicated than the number on the dial. Dough warms gradually. Yeast becomes more active early in the bake, then heat eventually stops fermentation. Water turns to steam, starch gelatinizes, and proteins set. The crust browns through caramelization and Maillard reactions, which create hundreds of flavor compounds from sugars and proteins.
For a crusty loaf, preheat a Dutch oven to 475 degrees Fahrenheit for at least 30 minutes. Bake covered for 20 minutes, then uncover and lower the temperature to 450 degrees for another 20 to 25 minutes. The lid traps steam during the first stage, keeping the crust flexible while the loaf expands. Removing it later allows browning.
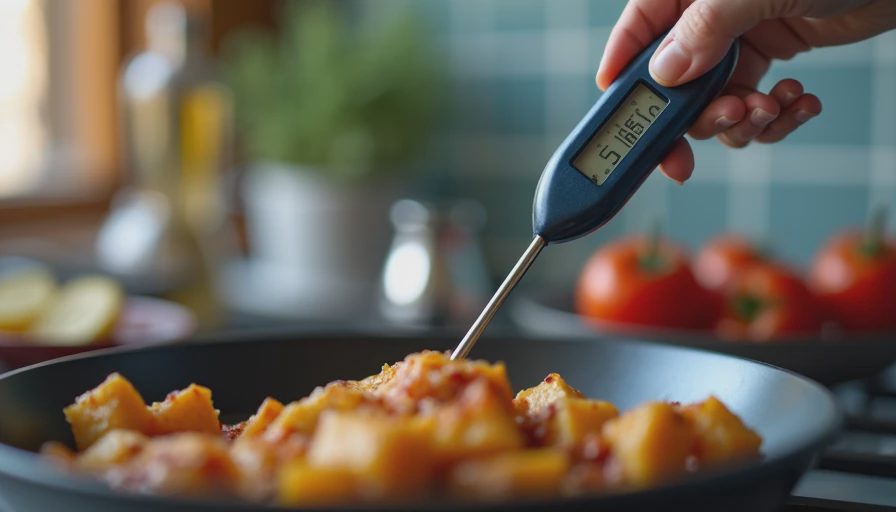
If the crust is dark but the center is gummy, the problem is not simply “bad bread.” The loaf may be too large, underbaked, or cut before the crumb finished setting. Let it cool for at least one hour. For a large loaf, an instant-read thermometer near the center should usually register around 205 to 210 degrees. I once sliced a beautiful loaf after 20 minutes and found paste inside. The knife was innocent; impatience was guilty.
Cakes, cookies, and the role of fat
In cakes, food science looks different because you are managing tenderness rather than a strong elastic network. Creaming butter and sugar creates tiny air pockets that expand in the oven. Eggs provide structure and emulsify fat with water. Baking powder releases carbon dioxide, while flour proteins set around the bubbles.
For a basic eight-inch cake, use 170 grams softened unsalted butter, 170 grams sugar, three large eggs at room temperature, 180 grams all-purpose flour, 6 grams baking powder, 2 grams salt, and 60 grams milk. Beat butter and sugar for three to four minutes, add eggs one at a time, then fold in the dry ingredients and milk just until combined. Overmixing after flour is added develops more gluten and can make the cake rubbery.
A sunken center usually means the structure was not ready when the door opened. It can also mean too much liquid, too little flour, or an oven that runs cool. Buy nothing fancy before checking the oven with a basic thermometer. A dial set to 350 degrees can be off by 25 degrees or more. That small difference changes how quickly the edges set.
A practical troubleshooting notebook
The most useful food science habit is recording what happened. Write down the flour brand, the grams of water, room temperature, starter age, mixing time, proofing duration, and bake temperature. You are not creating a dissertation. You are giving tomorrow's version of yourself clues.
If your loaf is dense with small, even holes, increase fermentation time or strengthen the dough with additional folds. If it has a huge tunnel beneath the crust, shape more firmly and press out obvious gas pockets. If the bottom burns, move the rack higher, place a sheet pan underneath, or reduce the baking temperature by 15 degrees. If the crust stays pale, confirm that the oven is fully preheated and bake uncovered longer.
Do not change five variables at once. Change one: 25 grams less water, a 30-minute shorter proof, or 10 degrees lower heat. Then compare the result. That is food science in the kitchen, and it is much less intimidating than it sounds.
The goal is delicious, not laboratory-perfect
Food science gives you better questions, not a demand for identical loaves. Weather changes. Flour changes. Starters have moods. Your oven has hot spots, and sometimes a toddler removes the kitchen towel from a rising bowl. The skill is learning which changes matter most.
Start with a recipe written in grams, use a timer, and look at the dough as often as you look at the clock. If a loaf comes out lopsided but tastes nutty and moist, it succeeded at dinner. If a cake cracks, cover it with frosting or powdered sugar. If the center is raw after cooling, do not serve it; throw it in the trash and learn from the measurements.
The dough will forgive you. So will I. Put on the apron and go ahead and do it. It does not matter if it is perfect or not, just make it delicious.

No comments yet.