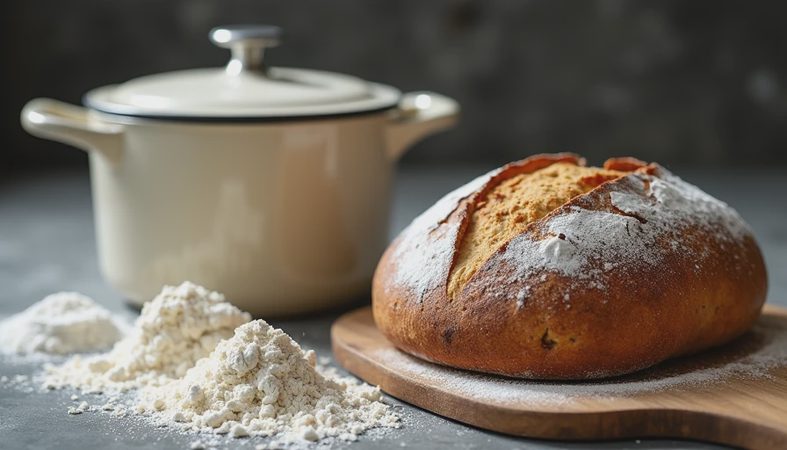
Easy bread baking sounds suspicious when every online loaf has a perfect ear, a honey-colored crust, and a crumb that looks like lace curtains. My kitchen does not look like that. Lily steals flour, Gus the starter occasionally sulks, and my Denver oven has burned more than one ambitious loaf. Still, easy bread baking is absolutely possible with a bowl, a scale, a baking sheet, and enough patience to let dough become dough. This simple recipe makes one crusty loaf without a Dutch oven, stand mixer, or heroic kneading session.
The simple formula that actually works
You need 500 grams bread flour, 350 grams water, 10 grams fine salt, and 4 grams instant yeast. That is 70 percent hydration: wet enough for a tender, open crumb, but not so wet that it turns into wallpaper paste. All-purpose flour works too, although the dough will usually spread a little more because it often contains less protein.
For easy bread baking, weigh the ingredients rather than using cups. Flour can vary by 30 grams or more depending on how tightly it is packed, and that difference is enough to turn a manageable dough into soup. Use water around 95 to 100 degrees Fahrenheit. Warm water speeds the yeast slightly; hot water can damage it. Add everything to a bowl and mix with a wooden spoon until no dry flour remains. Cover and wait 20 minutes.
That short rest is not decorative. It gives flour time to absorb water before you ask gluten to organize itself. After the rest, pinch and fold the dough for about one minute, then cover it again. The dough will be sticky, and that is normal. Do not bury it under extra flour just because it clings to your fingers.

First rise: watch the dough, not the clock
Leave the covered bowl at room temperature for 60 to 90 minutes. Every 30 minutes, wet your hand, reach under the dough, stretch it upward, and fold it over itself. Rotate the bowl and repeat four times. These gentle folds build strength without turning your counter into a flour-covered wrestling ring.
The dough is ready when it looks smoother, has risen by roughly half, and jiggles when you nudge the bowl. It does not need to double. In a cool room around 68 degrees, the rise could take closer to two hours. In a warm kitchen, it may finish in 45 minutes. Easy bread baking gets easier when you use those visual clues instead of forcing the dough to obey a timer.
If nothing seems to happen, check the yeast first. A packet that has lived open in a cabinet for a year is a reasonable suspect. Mix a teaspoon of yeast with 30 grams warm water and a pinch of sugar; if it does not foam within 10 minutes, replace it. If the dough rose fast and then collapsed, it probably fermented too long. Shape it gently and bake it anyway if it still smells pleasantly wheaty and yeasty. It may be flatter, but flat bread can still make excellent toast.
Shaping without destroying the air
Lightly flour the counter and scrape out the dough. Fold the left side to the center, then the right, followed by the top and bottom. Turn it seam-side down and use your cupped hands to drag it toward you in short motions. The goal is a taut surface, not a perfectly round boule. If the dough tears, stop pulling. Give it 10 minutes to relax, then continue.
Place the shaped loaf on parchment or a lightly floured towel. Cover it and let it rest for 35 to 50 minutes while the oven heats to 450 degrees Fahrenheit. Put a sturdy baking sheet or cast-iron pan inside during preheating. You do not need expensive equipment for easy bread baking, but a fully heated surface helps the bottom set quickly.
Test the final rise by pressing the dough lightly with a floured finger. If the dent slowly fills, bake. If it springs back immediately, give it another 10 minutes. If it stays deeply indented and the loaf feels fragile, it has gone too far. Score one slash about half an inch deep across the top. That cut gives expanding gas a planned exit instead of leaving you with a random side blowout.

Steam, heat, and the first ugly loaf
Slide the parchment and dough onto the hot pan. For steam, pour 100 grams boiling water into a separate metal pan on a lower rack, then close the oven quickly. Bake for 20 minutes with steam. Remove the steam pan carefully, lower the temperature to 425 degrees, and bake another 20 to 25 minutes. The loaf should be deeply golden, not pale beige. Its internal temperature should be at least 200 degrees if you use a thermometer.
Cool it for at least 45 minutes before slicing. I know that feels cruel. I once cut into a loaf after 12 minutes because Mark was hungry, and the crumb compressed into a gummy ring. The bread was not underbaked; it was simply too hot for the structure to finish setting. The crust will soften slightly as it cools, while the interior becomes sliceable and springy.
This is the unglamorous science behind easy bread baking: heat expands trapped gas, yeast creates more gas until it dies, and gluten plus starch set into the final crumb. You do not need to memorize the chemistry, but it helps explain why a cold center, weak structure, or rushed cooling creates trouble.
Troubleshooting the failures I actually see
A dense loaf usually comes from dead yeast, too little fermentation, or dough that was made with excess flour. Next time, keep the dough wetter and wait for visible growth. A loaf that spreads across the pan often needed stronger folds or a shorter final proof. Shape it tighter and use a smaller support, such as a parchment-lined cake pan.
A pale crust means the oven or baking surface was not fully hot, or the loaf lacked enough baking time. An almost-black crust with a damp middle means the oven runs hot or the loaf was placed too close to the top element. Tent it loosely with foil for the final 15 minutes and confirm the oven with a cheap thermometer. If the crumb is gummy but the crust is finished, lower the heat by 25 degrees and bake longer next time.
My favorite failure is the dramatic crack along one side. That usually means the score was too shallow or missing. It is not a ruined loaf; it is a loaf with an opinion. Slice it thickly, toast it, and make notes before the next attempt. The dough will forgive you. So will I.
A practical schedule for a weekday
At 6:30 p.m., mix the ingredients. At 6:50 p.m., begin the first fold. Fold again at 7:20 and 7:50, then shape around 8:20. Bake at 9:10, and the loaf can cool while you wash the bowl. For a more flexible schedule, reduce the yeast to 2 grams, cover the shaped loaf, and refrigerate it overnight. Bake it directly from the refrigerator the next morning, adding five minutes if it looks especially cold and firm.
This schedule is why I keep returning to easy bread baking. The hands-on work is short, the ingredients are inexpensive, and the dough does most of the labor while you answer email, help with homework, or stare at the ceiling. Start with one loaf, write down your room temperature and baking time, and change only one variable on the next attempt. That is how you learn what your flour and oven are doing.
Perfect is not the assignment. Delicious is. Put on the apron and go ahead and do it.

No comments yet.