No-knead sourdough sounds like a contradiction until you realize what the dough actually needs. It does not need a heroic workout or ten minutes of aggressive kneading. It needs time, a healthy starter, a few gentle folds, and enough heat to turn a shaggy bowl of dough into bread with a crisp crust. I have made beautiful loaves this way and several that looked like tan dinner plates. Both taught me something.
This version uses 500 grams bread flour, 350 grams water, 100 grams active sourdough starter, and 10 grams fine sea salt. That makes one medium loaf at about 70 percent hydration, which is wet enough for an open crumb but manageable for a first attempt. You will need a bowl, a dough scraper or sturdy spatula, parchment, and a covered baking vessel. A Dutch oven is convenient, but an oven-safe pot with a lid works too.
Why no-knead sourdough works
Traditional kneading develops gluten through repeated stretching and folding the dough over itself. No-knead sourdough takes a slower route. Water hydrates the flour, enzymes begin changing the dough, and fermentation gradually gives the gluten network more strength. Time is doing the repetitive work your hands normally would.
The starter also matters. Use it when it is bubbly, pleasantly tangy, and close to its peak, usually four to eight hours after feeding at a comfortable room temperature. A starter that has risen and collapsed can still leaven dough, but the rise will be slower and the flavor sharper. If your starter smells like nail polish remover, feed it before baking. Mine, Gus, is not allowed near the mixing bowl until he has at least doubled.
Mix the flour and water first, making sure no dry patches remain. Cover and rest for 30 minutes. This short autolyse gives the flour a head start. Add the starter and salt, then squeeze and fold the mixture with wet hands until everything is evenly combined. It will look lumpy and feel sticky. That is normal, not a personal failure.
A realistic fermentation schedule
For no-knead sourdough, bulk fermentation is the stage most likely to cause trouble. Keep the covered bowl somewhere around 72 to 78 degrees Fahrenheit and expect four to six hours, though a cool kitchen can take longer. Do not wait for the dough to double. Look for a 50 to 75 percent increase, bubbles around the edges, a smoother surface, and a gentle wobble when you move the bowl.
During the first two hours, complete four sets of folds, spaced 30 minutes apart. To fold, lift one side of the dough until you feel resistance, then lay it over the center. Turn the bowl and repeat three more times. Wet hands prevent the dough from sticking. After the fourth set, leave it alone to finish fermenting.
The most common failure here is an underproofed loaf. The dough stays dense, tears when shaped, and produces a tight crumb with a heavy bottom. If your kitchen is 68 degrees, add time rather than guessing from the clock. If the dough has spread into a loose puddle, smells strongly alcoholic, and has many fragile bubbles, it may be overproofed. Bake it anyway in a loaf pan or use it as focaccia. A crooked focaccia is still dinner.
Shape gently, then chill
Turn the fermented dough onto a lightly floured counter. Use a bench scraper to create a loose round, pulling the dough toward you to build surface tension. Let it rest uncovered for 20 minutes. Then shape it more firmly by folding the top and bottom toward the center and rolling it into a tight oval or round.
Place the dough seam-side up in a floured basket or a bowl lined with a well-floured cotton towel. Rice flour is especially useful because it stays powdery and resists absorbing moisture. Cover and refrigerate for eight to 16 hours. This cold proof improves flavor and makes the dough easier to score, but it is not magic. If bulk fermentation was incomplete, the refrigerator will not rescue it.
I once rushed this stage because Lily wanted breakfast and Mark had already started the coffee. The loaf looked sturdy in the basket, then spread immediately on the parchment. It baked into something flatter than planned but made excellent toast. The fix next time was simple: I let bulk fermentation continue for another 45 minutes before shaping.

Bake for crust, color, and a cooked center
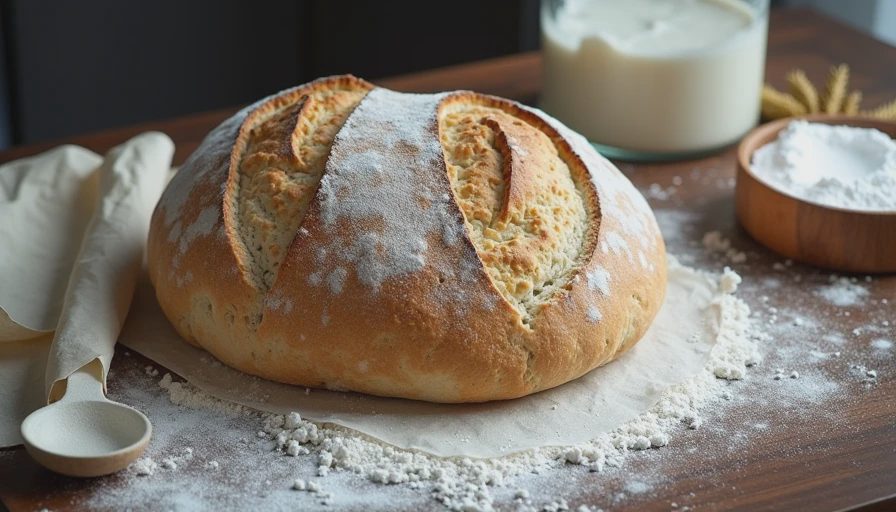
Put the covered baking vessel in the oven and preheat to 475 degrees Fahrenheit for at least 30 minutes. Turn the cold dough onto parchment and score it with one confident slash about half an inch deep. A sharp razor works best, but a clean utility blade can do the job. Transfer the dough carefully into the hot pot.
Bake covered for 25 minutes, then remove the lid and lower the oven to 450 degrees. Continue for 20 to 25 minutes, until the crust is deeply golden brown. If you own an instant-read thermometer, aim for an internal temperature around 205 to 210 degrees. Let the loaf cool for at least one hour before slicing. Cutting sooner releases steam and can leave the crumb gummy.
If the top browns too quickly, lower the oven by 15 degrees after removing the lid. If the bottom burns, place a baking sheet on the rack below the pot or use a doubled sheet of parchment. Every oven has a personality. Mine runs hot enough to turn an innocent loaf into a campfire prop.
Troubleshooting the loaf you actually baked
A flat loaf usually means weak gluten development, overproofing, or dough that was too warm for too long. Next time, reduce the water to 335 grams and watch the dough instead of the timer. A dense loaf with a few large holes near the top often needs more bulk fermentation. Give it another 30 to 60 minutes at room temperature before shaping.
A gummy center can come from underbaking, slicing too early, or using too much water for your flour. Bake longer, cool completely, and weigh the flour rather than measuring by cups. A pale crust usually means the lid stayed on too long or the oven was not fully preheated. For no-knead sourdough, heat is part of the structure-building process, not just a way to brown the outside.
If the dough refuses to rise after several hours, inspect the starter first. A weak starter cannot provide strong lift, no matter how carefully you shape. Feed it equal weights flour and water, keep it warm, and wait until it rises predictably before trying again. If one loaf fails, turn it into croutons. The trash is allowed, but it should not be your first move.
The simple formula to keep
Write this ratio on a sticky note: 500 grams flour, 350 grams water, 100 grams active starter, and 10 grams salt. Mix, rest, fold four times, ferment until visibly puffy, shape, chill, score, and bake hot. No stand mixer, special flour blend, or professional steam system is required.
No-knead sourdough rewards observation more than perfection. Your room temperature, flour, starter, and pot will change the schedule every time. Take a photo before shaping and another after baking; the comparison teaches more than a hundred confident recipe captions. Look for a loaf that tastes wheaty, lightly tangy, and good with butter, even if the score opens sideways.
The dough will forgive you. So will I. Put on the apron and go ahead and do it. It does not matter if the loaf is perfect or not, just make it delicious.


No comments yet.