The best tried-and-tested baking advice does not begin with a perfect loaf, a spotless counter, or an oven that behaves like a bakery deck oven. It begins with what actually happened: the dough spread, the crust went dark, or the cake sank five minutes after leaving the oven. I have made all of those mistakes, sometimes before breakfast, and I want to help you avoid repeating them without pretending baking is completely predictable.
What tried-and-tested really means in baking
When I call a method tried-and-tested, I mean I have made it repeatedly in an ordinary home kitchen and paid attention to the details that change the result. That includes flour temperature, room temperature, dough strength, fermentation time, pan material, and the slightly dramatic personality of a home oven. It does not mean every bake comes out identical. Bread is living dough, and a recipe written for a Denver kitchen in January will not behave exactly the same way in a humid Florida kitchen in July.
A tried-and-tested method should give you useful checkpoints rather than one rigid clock. For sourdough, the dough should look aerated and hold its shape before baking, not simply reach a particular number of hours. For a sandwich loaf, the dough should rise close to the rim of the pan and spring back slowly when pressed. Those observations are more reliable than blindly following a timer.
My basic tools are a digital scale, a bowl, a bench scraper, and a kitchen towel. A Dutch oven is helpful, but it is not a personality requirement for good bread. You can bake a lovely loaf on a sheet pan with steam from a preheated metal pan. The dough will forgive you. So will I.

A tried-and-tested sourdough schedule
For a manageable country loaf, I use 500 grams bread flour, 350 grams water, 100 grams active starter, and 10 grams fine salt. That is 70 percent hydration, enough for an open crumb without turning the dough into pancake batter. If your starter is sluggish, feed it and wait until it has doubled, smells pleasantly tangy, and shows bubbles along the sides of the jar.
Mix the flour and water first and rest them for 30 minutes. Add the starter and salt, then work the mixture until no dry flour remains. Over the next two hours, complete four sets of stretch-and-folds, spaced 30 minutes apart. After that, leave the dough covered until it has risen by roughly 50 percent. In my kitchen, that usually takes another two to four hours at 72 to 76 degrees Fahrenheit.
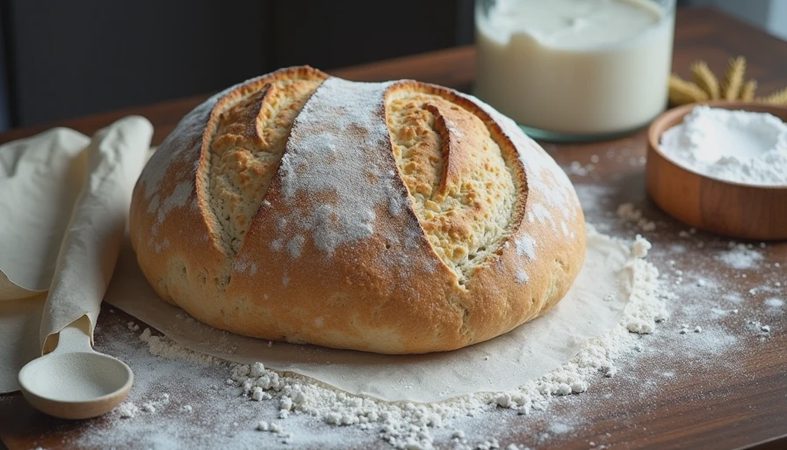
Shape the dough gently, place it seam-side up in a floured bowl, and refrigerate for 8 to 14 hours. Bake in a preheated 450-degree Dutch oven for 20 minutes with the lid on, then 20 to 25 minutes uncovered. Let it cool for at least one hour before slicing. Cutting early gives you gummy slices and makes an otherwise good loaf look underbaked.
Fixing the failures I see most often
A flat loaf usually has one of three problems: underdeveloped gluten, over-fermentation, or a dough that was too warm for too long. If the dough tears during shaping, give it another fold and rest for 20 minutes. If it feels loose, sticky, and full of fragile bubbles, it may be over-proofed. Bake it anyway if it can be transferred safely; the crumb may be tight, but toast can rescue a surprising amount.
A dense loaf with a wet center often comes from slicing while hot, not from raw dough. Cool it completely, then check the crumb. If the loaf truly is underbaked, return slices to a 350-degree oven for 10 to 15 minutes. For next time, use an instant-read thermometer and aim for an internal temperature around 205 to 210 degrees Fahrenheit for a lean bread.
One tried-and-tested rescue is turning an ugly loaf into croutons. Cut it into 1-inch cubes, toss with 25 grams olive oil, add 2 grams salt and a pinch of dried herbs, then bake at 375 degrees for 15 to 20 minutes. Nobody complains when the failure arrives as crunchy salad topping.

Tried-and-tested cake habits for a home oven
Cakes fail for different reasons. A sunken center often means the structure was not set before the door opened, the batter contained too much liquid, or the oven temperature was lower than its dial suggested. Preheat for at least 20 minutes, use the middle rack, and avoid opening the door during the first two-thirds of baking. If your oven runs cool, an inexpensive oven thermometer can reveal a 25-degree difference that explains several disappointing layers.
For a simple 8-inch butter cake, bring 113 grams butter, 150 grams sugar, two large eggs, and 120 grams milk to a similar room temperature. Cream the butter and sugar for three minutes, add the eggs one at a time, then mix in 180 grams flour, 6 grams baking powder, and 2 grams salt in alternating additions with the milk. Stop mixing as soon as the flour disappears. A tried-and-tested cake is usually improved by less stirring, not more.
A cracked top is not a disaster. It can mean the oven was hot, the pan was too small, or the batter was placed too high in the oven. Trim the ridge, brush the cake with simple syrup, and cover it with frosting. Delicious does not require architectural symmetry.
How I record a tried-and-tested bake
My old data analyst habits are useful here. After each bake, I write down the flour brand, gram weights, room temperature, mixing time, proofing time, oven setting, and result. I also take one photograph of the crumb. This turns vague frustration into a pattern. If three loaves spread after long fermentation, the issue is probably timing or starter strength. If only one spreads, the shaping or transfer may be responsible.
Change one variable at a time. Do not increase hydration, switch flour, lower the oven, and shorten the proof all in the same bake. You will get a different result, but you will not know why. A tried-and-tested process is built through small, boring adjustments that eventually make your hands faster and your judgment calmer.
Bake the good-looking-enough version
The internet is full of pale, perfectly scored loaves photographed in beautiful light. Your loaf may have a crooked ear, a dark corner, or a crumb that is tighter than planned. If it tastes good with butter, soup, or jam, it has done its job. My tried-and-tested recipes are designed for the bake you can actually make after work, with a toddler asking for a snack and flour on your shirt.
Start with one dough and make it three times before changing the formula. Learn how it feels when it is ready, how quickly your oven browns the crust, and how much time your kitchen adds or subtracts. Put on the apron and go ahead and do it. It doesn't matter if it's perfect or not, just make it delicious.


No comments yet.